This apron is for my co-worker's niece. I loosely used McCalls 5551 for the sizing and made a Kids 10-12. The pattern includes three or four different apron styles with kids and adults sizes. The soccer prints are from Robert Kaufman. The main fabric is a black and white cotton gingham.
I have a knack for making the simplest projects complex...and time consuming. Because the gingham is so thin, I had to make the apron two thicknesses. I basically made two aprons, joined them right-sides-together and turned right side out. In the end the apron is reversible.
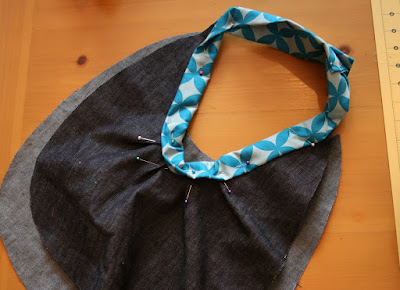
This is actually the second version of the apron skirt. Initially, I made a gathered skirt. It was so cute and worked well with the thin gingham...but I had to consider the gift recipient who was described to me as a "tomboy" who wouldn't want anything too girly. I decided the gathers (combined with all the pink) pushed the apron into girly-overload. They had to go. I made the neck strap adjustable by using two d-rings.
Sunday, December 6, 2009
Tuesday, November 24, 2009
Brown Rose Tote, take two
Stephanie asked me to make another of the brown rose tote that I took to the craft fair. Making the bag a second time allowed me to tweak a few things. Megan, the recipient of the first brown rose tote, gave me some feedback that the straps would be a bit short, especially when wearing a heavier coat. So, for this second version the straps are about an inch and a half longer. I added some additional pockets inside and a key fob.The tote design is fairly simple. I tend to like simple shapes and lines with a combination of solids and prints on the exterior. The outer print is Frippery Birds and Roses in brown. The solid is a home dec cotton and the lining is a quilting cotton from the wall at JoAnn.I'm still trying new interfacings. Here, I used a woven fusible interfacing to add some body to the Frippery print. I then interfaced the lining bag with fusible fleece. It is still a trial and error process. I picked up some cotton batting to try in a future bag. We'll see how that goes.
After all these recent bags, I am anxious to sew something different. Next up is the soccer apron. I also picked up a new book Chic and Simple Sewing by Christine Haynes. I am anxious to sew some more clothing and work on my garment construction skills!
Stitch Spring Tote in Ginseng
Here is my second version of the Spring Tote from the Spring 2009 Stitch Magazine. This pattern is by Rashida Coleman-Hale of i heart linen. The exterior prints are Joel Dewberry's Ginseng collection and the lining is his Blackeyed Susan. I love the rich colors and cotton sateen finish of the Ginseng home dec fabrics. The solid outer fabric is a woven home dec fabric that may be a cotton/poly blend.
The first time I made this bag in August, I worked up a sweat, pounding away at the eight grommets in a closed garage in 80+ degree heat. This time it was a cool 50 or 60 degree garage in November...much better! I love this mild weather we are having in Ohio. Look at that green grass, just a few days before Thanksgiving!
Tutti-Fruiti
The Chocolate Buttercup Bag in the previous post was for Megan, a jewelry artist in my area and fellow vendor at the recent craft fair I attended. At the craft fair, she and I traded a bag for a necklace, then I asked for a custom pair of earrings, then she asked for the Buttercup Bag and then I asked for a pair of earrings....and the cycle goes on.
No actual money has changed hands, rather some handmade lovlies. A win-win for both of us, right??
Megan is incredibly talented and even teaches classes locally. She has some gorgeous pieces on her website and also makes custom pieces.
Here is my Tutti-Fruiti necklace and earring set made by Megan:I love the variety of colors, shapes and sizes of beads in this piece. This necklace is actually three separate beaded, twisted strands that are then braided together. I've worn this with orange, green, charcoal and ice blue sweaters and it looks great.
The fun doesn't end there. Megan kindly shared my blog with some friends, one of whom asked me to make a bag or two. Stephanie's bags are coming up in a future post.
Saturday, November 21, 2009
Chocolate Buttercup
I was commissioned to make another Buttercup Bag. This is the larger size that comes with the commercial license available on Rae's blog. Since I was charging for this one (well sort of...I'll get to that in another post!), I purchased the license. This makes a nice size bag, good for everyday use. I wish I took a picture of myself holding the bag to show the scale.
Megan purchased her outer fabric, a silky chocolate brown. She chose the lining fabric, lime and brown Robert Kaufman jacquard, from my stash. I love the punch of color the lime adds. I finished this one with a magnetic closure and two inner pockets. When constructing the bag, I used fusible interfacing with the lining and handle, but no interfacing with the outer fabric. This method seemed to worked fine.
The outer color reads so differently in this last picture because of the flash, but I like how the sheen and sharp pleats are highlighted. The Buttercup was a good first project with the new machine. So far, so good!
Tuesday, November 10, 2009
Christmas came early...
One of these pretties is now sitting in my sewing room with a bobbin wound and ready to go. If you've been reading my recent posts, you may recall I have had some challenges with bobbins and tension and borrowed machines, always at the worst times when I was trying to finish a gift or build an inventory for the craft show.
My hubby suggested earlier in the year that I should just buy a new machine...likely after he heard me "talking" to the malfunctioning machine and telling it where I would like to throw it. I thought I would hold-off at that point to make sure I was really going to keep up with the sewing. At this point, I'm committed to sewing (and amassing a fabric stash....) and really need a functioning machine.
This one should fit my needs. It has some great features - automatic buttonholer, needle up/down button, locking stitch, 50 stitches (more than I really need), speed control, computerized stitch length for consistency, etc. It does a blind hem stitch and smocking and has some decorative stitches that should be nice for garment sewing.
I purchased from Sew-Ezy a local quilt shop which is, as far as I can tell, the only Janome dealer in Cincinnati. The women at the shop were so helpful and took time to show me features and benefits and let me sew a little. A machine purchase from the shop includes classes that I am excited about. [Just another reason to buy local as often as you can....]
After I've sewn with this for a month or so, I'll be sure to write a review here. The blog posts and online reviews I found during my research were so helpful. I don't make a major purchase anymore without a little help from google!
Saturday, October 24, 2009
Craft Fair
I participated in a small craft fair today, which I'll call a marketing test. It was a small show at my local YMCA, with a booth fee of just $25. Foot traffic was minimal as there was not a great deal of advertising. The best part of attending, I found, was meeting other crafters and talking about our creativity. There were many other first-timers there, so the camaraderie was nice.
I traded this brown rose bag with a fellow crafter for a beautiful beaded silver necklace and earrings. You can see an example of my hangtag on the bag. I opted to use simple handwritten cardstock tags. At Target, I picked up a two-pack of punches that included both the circle and butterfly punches. It turned out to be an easy and inexpensive way to make tags.
My product inventory was not quite as planned because my machine kept failing in the weeks before the show, with major tension issues and loopy stitches on the underside of the fabric. After trying everything - new needle, rethreading, adjusting tension, rethreading bobbin, etc.-I gave up (last night at 2 AM...arghhhh) It may be time to browse for a new machine :)
I was really discouraged to have such a small product offering (and a lot of unfinished items at home), but felt better after I saw the foot traffic at the fair. It is all a learning experience. I took a few of my larger totes and shoulder bags, kid-sized pocket totes, zipper pouches and two pennant banners. The larger totes got attention and compliments, but most people were not looking to spend much. Next time, I might make a less labor-intensive tote still using the bright, designer fabrics, that I can offer at a reasonable price. I took notes of items that people requested.
Here is my little display. This fair was small, so no one had large constructed booths, just tables. I spent a minimal amount, purchasing only the tablecloth and rack for the small totes. The other items are from my home. The larger totes are resting against two basket cubes from IKEA that I use in my sewing room bookcase. I turned them on the side, so the front side could prop the bags and the backside could hold my supplies (bags, blackberry, pens) out of sight. You'll never guess what I used to hang the kid totes....a free-standing toilet paper rack (Target again...and used specifically for this purchase...never placed in my bathroom!!). It worked great!
My super-crafty cousin purchased this tote along with a small zipper pouch for my first sale. Unfortunately in the stress of trying to finish product and fiddling with the machine, I didn't take any proper pictures once my new bags were finished. This is the first more complex bag that I have designed start to finish. The side panels and bottom exterior pockets with binding trim wrap around the sides of the bag. Inside I added a panel of pockets on each side and a key fob. I will definitely make more of these.
All in all, attending the fair was a good (learning) experience. Truthfully, I am relieved it is over and am ready to catch up on my sleep!! Talking with the other crafters has me energized to keep sewing and being creative.
I traded this brown rose bag with a fellow crafter for a beautiful beaded silver necklace and earrings. You can see an example of my hangtag on the bag. I opted to use simple handwritten cardstock tags. At Target, I picked up a two-pack of punches that included both the circle and butterfly punches. It turned out to be an easy and inexpensive way to make tags.
My product inventory was not quite as planned because my machine kept failing in the weeks before the show, with major tension issues and loopy stitches on the underside of the fabric. After trying everything - new needle, rethreading, adjusting tension, rethreading bobbin, etc.-I gave up (last night at 2 AM...arghhhh) It may be time to browse for a new machine :)
I was really discouraged to have such a small product offering (and a lot of unfinished items at home), but felt better after I saw the foot traffic at the fair. It is all a learning experience. I took a few of my larger totes and shoulder bags, kid-sized pocket totes, zipper pouches and two pennant banners. The larger totes got attention and compliments, but most people were not looking to spend much. Next time, I might make a less labor-intensive tote still using the bright, designer fabrics, that I can offer at a reasonable price. I took notes of items that people requested.
Here is my little display. This fair was small, so no one had large constructed booths, just tables. I spent a minimal amount, purchasing only the tablecloth and rack for the small totes. The other items are from my home. The larger totes are resting against two basket cubes from IKEA that I use in my sewing room bookcase. I turned them on the side, so the front side could prop the bags and the backside could hold my supplies (bags, blackberry, pens) out of sight. You'll never guess what I used to hang the kid totes....a free-standing toilet paper rack (Target again...and used specifically for this purchase...never placed in my bathroom!!). It worked great!
My super-crafty cousin purchased this tote along with a small zipper pouch for my first sale. Unfortunately in the stress of trying to finish product and fiddling with the machine, I didn't take any proper pictures once my new bags were finished. This is the first more complex bag that I have designed start to finish. The side panels and bottom exterior pockets with binding trim wrap around the sides of the bag. Inside I added a panel of pockets on each side and a key fob. I will definitely make more of these.
All in all, attending the fair was a good (learning) experience. Truthfully, I am relieved it is over and am ready to catch up on my sleep!! Talking with the other crafters has me energized to keep sewing and being creative.
Sunday, October 18, 2009
Another Kidlet
I made another Kidlet today using Jennifer's tutorial. This one is for my sister who is expecting a little boy in November. For her baby shower today, I filled the Kidlet with a couple of board books, breast pads and lanolin cream, hand cream and lip balm. I hope she finds this useful for stashing all the little things that a nursing mom might need close at hand. The nursery colors are brown and blue, so I paired a dark brown cordury with brown and white gingham lining. I have been using more and more gingham for bag linings while using more modern prints on the exterior. For the pocket, I used various blue prints from my scraps, but stayed away from anything too kiddy, so the Kidlet will work well in rooms other than the nursery.
Two things I hate in bags are floppiness and wimpy straps. The first Kidlet I made was a little too floppy, so this time I used a heavier interfacing. This is the first time I have tried Decor Bond. It made for a nice, sturdy bag and pressed well, with no dimples, once the bag was turned right side out.
Wednesday, September 30, 2009
Bags, Bags, Bags!
I am on a bag kick, designing my own. The bag above is the first finished product I have to show; a few others are pictured in-process below. This one is made from an olive linen blend with the pop of Orange Leaf Dot (from Park Slope by Erin McMorris). It is a good sized shoulder bag - not too big, not too small. I am enjoying designing the bags from start to finish experimenting with different fabrics and shapes.
Anyone else have a love/hate relationship with interfacings?? For the bag above, I used fusible fleece, but think that the linen was just too thin for it. After turning the bag out several times due to ripped-out seams and redos, the fabric has that weird dimply look. Fusible fleece did work perfectly for the straps. I hate wimpy straps and need them to have some body. I purchased some decor weight fusible interfacing and am trying flannel layers and sew-in rigid interfacing...we'll see what works best.
Here are some others in progress. I picked up this dark denim and like the way it contrasts with the prints (yes, more orange...i heart orange). I love prints, but I'm not really an all-over print-bag kind of girl. I like to break it up with solids and keep simple lines.
Thursday, August 27, 2009
Bundled
I bundled my love (and some sewing supplies) and will ship it all off to Iraq tomorrow. The limits of the flat rate box were stretched, but with some effort, I was able to tape the box closed! The bundle contains 5-6 different fabrics, some ribbon and thread. I also threw in a few travel sewing kits picked up at hotels over the years. Those kits were nice to include since they include pins, needles, safety pins and thread. I wrapped the bundle in a vintage table cloth. Let's hope a woman in Iraq soon finds these supplies useful.
Art's post over at the IBOL blog today said the site has had 31,000 hits! WOW! The power of the blogosphere is working for the greater good. I love it!
Monday, August 24, 2009
Iraqi Bundles of Love
Have you heard about Iraqi Bundles of Love, an effort started by a US soldier stationed in Iraq? He saw a need for sewing supplies amongst Iraqi families and started collecting bundles of sewing and knitting supplies to distribute. So far, the bundle count is 80. That number will soon grow exponentially since the effort was featured on the Sew Mama Sew blog today. He already estimates being able to distribute to three provinces and anticipates the need for air support for massive distribution!
Self-contained bundles of fabric, yarn and notions are requested to be mailed by September 7 per instructions on the blog. Sew Mama Sew is offering to build and send bundles for a $15 donation.
Be sure to visit the IBOL blog to read how this soldier was inspired during his multiple visits to Iraq. He updates with pictures of the many bundles piling up and throws in some humor supplied by the unit's resident kitty. And his "about me", while simple and succient, touched me -- "I am the son of a quilter, who also made Halloween costumes for us kids. I am the brother of quilters, who give generously in everything they do. I am the husband of a quilter, who inspires me every day. And, apparently, I am helping to raise a quilter, who happens to be the cutest girl in the world."
I have read about several other service efforts in the sewing blogosphere and "meant" to participate. This one is a must for me.
Sunday, August 23, 2009
A Skirt for my Sweetie
It's a skirt weekend around here. So far, I had not made much clothing for my daughter as she already has an abundance of cute summer dresses. It is so easy to find cute clothes for a little girl, but not so much for a thirtysomething mom. So, I have focused mainly on sewing clothing for myself. But I received this fabric from Park Slope by Erin McMorris in one of the scrap packs I ordered and knew it was destined to be a sweet little girl skirt.
Fortunately the scrap pack pieces are full width 44" cuts, a great width for a gathered skirt. I just squared up the fabric and sewed the selvedge edges together as a back seam. Then I made a casing for 1/2" elastic and sewed a 1/4" rolled hem. Done. Easy.
I like that underneath it all, this is still an intact 44" wide piece of fabric, in case this fabric wants to become something else in the future. Of course, the skirt should last a few seasons with the flexibility of the elastic waist band and the generous length (this piece was a 13" cut.) I also left a few extra inches of elastic at the end of the waistband in case we need to let it out later.
Thursday, August 13, 2009
Spring Tote from Stitch
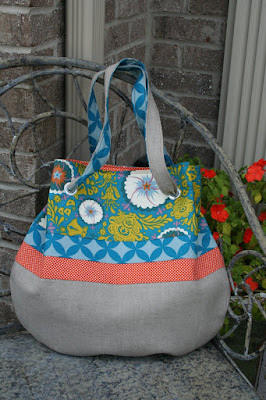
I pounded away at the grommets and finished this bag today. It is the Spring Tote from Stitch Magazine (Spring 2009 issue). The two blue fabrics are from Good Folks by Anna Maria Horner. The orange dot is a quilting cotton and the main fabric is 100% linen. The tote is a nice size and is sturdy from a layer of fusible fleece.
The pattern and instructions were easy to follow. I slightly reshaped the pattern pieces to make the bottom of the bag more rounded and added an extra interior pocket. The handles are a little short, but I will not rework them. Handles are my least favorite part of making bags!
The grommets did take alot of pounding! The kit that I purchased at the fabric store included everything needed (minus the hammer) for installation.
For Stitch fans, I noticed today that the website includes a preview of the Fall 2009 issue (available in early October) including a cover shot, table of contents and a pre-order option.
Friday, August 7, 2009
A Kidlet for the Kid Stuff
Today, I made this Kidlet, from Jennifer's tutorial. It's a handy little bag to hang on a doorhandle or wall hook to collect the little kiddy stuff that ends up all over the room. For the main fabric, I used a heavyweight cotton with a subtle stripe effect (yep, it's an IKEA curtain panel). The lining and patchwork fabrics were in my stash. This was my first go at patchwork.
This one will hang in the hallway adjacent to our family room. I will probably make another for
upstairs. These would be handy to have during the baby days for bibs, burb cloths, pacifiers, nursing pads/cream, etc. Note to my two expecting sisters...pretend you did not read this and act surprised, okay :)
Tuesday, August 4, 2009
Instant Gratification
I whipped up a drawstring bag based on the instructions in Weekend Sewing by Heather Ross. This was made to hold a birthday gift. I will probably make some more of these for my husband to use as shoe bags when traveling. He keeps hinting that I don't sew anything for him! The fabric is a tablecloth from IKEA. This one was $5 in the As-Is section. Lots of nice, heavy cheap fabric to use. And I like that the colors are different...unexpected.
An fyi for those using the book instructions. The photo in the book shows only one drawstring, but the instructions call for two (as shown above). I like using two drawstrings, it makes the bag easy to cinch. I used twill tape for the drawstrings. So the inside edges would be finished neatly, I used french seams.
Here is a close up of the (somewhat sloppy) zigzag technique used for the drawstring casings.
The halter that was a dress that was a tank
This top started out as a dress in my mind. Then I realized that an empire waistline starting that high would not be flattering for my body shape. So I decided to make a simple tank rather than a dress. Then I sewed one of the straps on at a weird angle that worked better as a halter strap. So I settled on a halter. I like this kind of creating...figuring it out as you go and not being afraid to move away from your original plan.
I drafted the pattern using an Ann Taylor Loft top that I have with a simple design to duplicate. The fabric is a cotton voile that I picked up locally for $2.99 a yard! I love the colors. Because of the lightweight and almost sheer quality of the fabric, I added a muslin lining to the bottom half of the shirt. The top portion of the top is interfaced along with the straps to add some body.
I still need to make some fit adjustments. The top portion is a little big and the elastic just loose enough to not feel confident that it won't slip too low in the back.As a bonus, once I finished the top, I realized I have two cardigans that will make this wearable for work and that match perfectly, one the medium green and one the light blue in the print. And I love how it works with this pretty necklace I ordered from Snapdragon on etsy. I'm not a paid sponsor :)...just a happy customer. I love green and this adds a great boost of color to so many outfits.
The color is so blah on these pictures. Trying to capture the last bit of natural light on a dreary day gave me dreary pictures!
Saturday, July 18, 2009
Hello, Summer! Amy Butler Pillows
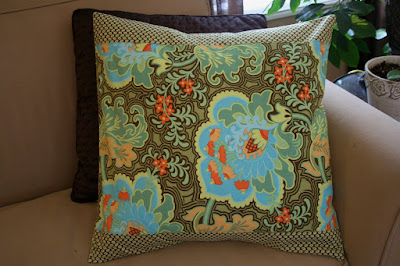
Doesn't this fabric scream summer? Our family room was in need of a summer infusion. This winter, the room was painted - transforming it from cold builder-beige to warm tan. The new color warms the room so much, but it was feeling a little like fall with all the tan and brown furniture. I have orange and green accents in the room, so this fabric worked perfectly. I received the main fabric (Amy Butler Gothic Rose) in a scrap pack ordered from etsy. The cut was only a 14 inch cut, so to fit my 20 inch pillow form, I added the border (Amy Butler Olive Seeds). By the way, if you need pillow inserts, I found that IKEA is a good source. These 20 inch feather-filled inserts were only $6.99 each.
I like how the floral pattern mimics the brown vine pattern on the adjacent slipper chairs.
Rather than add a zipper, I opted for a simple envelope design and used a coordinating stripe (Amy Butler Oxford Stripe).
I would like to try the patchwork pillow on the cover of the latest Stitch magazine. I've never done patchwork or quilting, so this might be a good introduction.
Friday, July 17, 2009
Maggie's new duds
Meet Maggie. She was my daughter's first babydoll, a gift from my mom soon after my daughter's birth. After nearly four years with us, Maggie's original clothes are looking a little worn. I planned to make her a new outfit last Christmas, but didn't get to it. So, this week, I whipped up a summer dress and bloomers from some scraps in my stash. It was a quick and easy project....just a simple halter top connected to a gathered skirt. It is sort of a pain to sew such teeny-tiny seams. I got lazy toward the end and just zig-zagged along the hem of the dress and bloomers. I'll see how that holds up after washing and add a proper hem if necessary.
My daughter wanted to make Maggie a leotard. This was totally unprompted by me, so it was fun to see her interest. I gave her a few scraps and she started cutting and glueing! You can see got the shape pretty accurate, complete with shoulder straps and a skirt. The "finished' leotard wasn't exactly functional but it was fun to watch my daughter's creative process!
Subscribe to:
Posts (Atom)