Showing posts with label quilting. Show all posts

Friday, September 23, 2016

What I've learned after finally jumping into quilting (...and why did it take me so long?)


I'm still newish to quilting.  After sewing just about everything except quilts for awhile, I finally tried it a couple of years ago!  To be honest, I was intimidated to try quilting before.  I was worried about feeling incompetent - am I cutting right?  do I have the right tools?   how am I ever going to be precise enough? what will the "real" quilters think?

Why are we like this as adults?  Kids don't have this filter. They just jump in and try and are simply pleased by the act. They don't care as much about the final product.


Nevertheless, I finally made a quilt a two years ago.  My first finish was made to celebrate my baby niece's arrival and was finished, oh, the night before my sister's baby shower.  I wrote about that quilt here, and also cautioned against making your very first quilt as a gift to someone special. The whole "gift" aspect adds a wee bit of pressure!
baby quilt for my sweet niece
Since then, I haven't actually finished a whole quilt.  I have a Modern Maples top that I pieced...and have yet to quilt.  I made a couple of mini quilts - one for a swap and one for my daughter's room.  Those were satisfying finishes.  And recently I helped coordinate two quilts for the Orlando MQG's #quiltsforpulse effort.  But that's it!
a mini for my daughter

Raspberry Kiss mini for #lovewinsminiswap
Wait, I honestly forgot two others until I looked through my photostream!  I finished a little doll quilt for a friend's one-year old.  And how could I forget the labor of love that was my nephews' i-spy drawstring quilt?!?
doll quilt in the softest Blueberry Park colors


i-spy drawstring quilt

But, no finishes of large quilts, like throw size or bed size. And I'm okay with that.  Here's why....


As a new quilter, I've taken some steps to build my skills first  I'm the kind of person who wants to know the ins and outs.  I research things to death.  I have a curiosity and want to know all the answers.  (Maybe the reason it took me so long to actually quilt, instead of exhaustingly reading about it.)   I thought a sampler would be a great first step in providing an opportunity to try many different blocks and learn new techniques.  And a sampler would force me to practice, practice, practice, and would get me sewing on a regular basis.  Sometimes we forget as adults the need to practice a new skill in order to get "good" (On a side note, i just listened to a great episode of the Good Life Project podcast that hit on this very topic of learning new skills as adults and being vulnerable....)


The Modern HST Sampler Quilt Along hosted by Alyce of Blossom Hearts Quilts seemed like a great place to start.  Half-square triangles are foundational to quilting and Alyce promised to teach several different methods and provide us the quilt math to master HSTs!  And two blocks per month seemed a perfect pace. In addition, Alyce hosts an great facebook group where fellow members post pictures of their blocks, share questions or tips and encourage each other. The group is so supportive and inspirational.  What a nice little corner of the world wide web!


At this point in the sampler QAL, I now realize that my fabric pull was somewhat ambitious for a newbie. Nearly ten different designers, numerous prints and colors, and an array of low volume background fabrics.  Phew!  The amount of fabrics has challenged me (in such a good way) to choose just the right fabric combinations to make individual blocks work, but also to consider the bigger balance of color and value to ensure cohesion.

my fabric pull
Pairing fabrics and considering placement, and then seeing the blocks come together is absolutely my favorite part of the process. And when it works, it works and is so satisfying!
block 14 : introspection


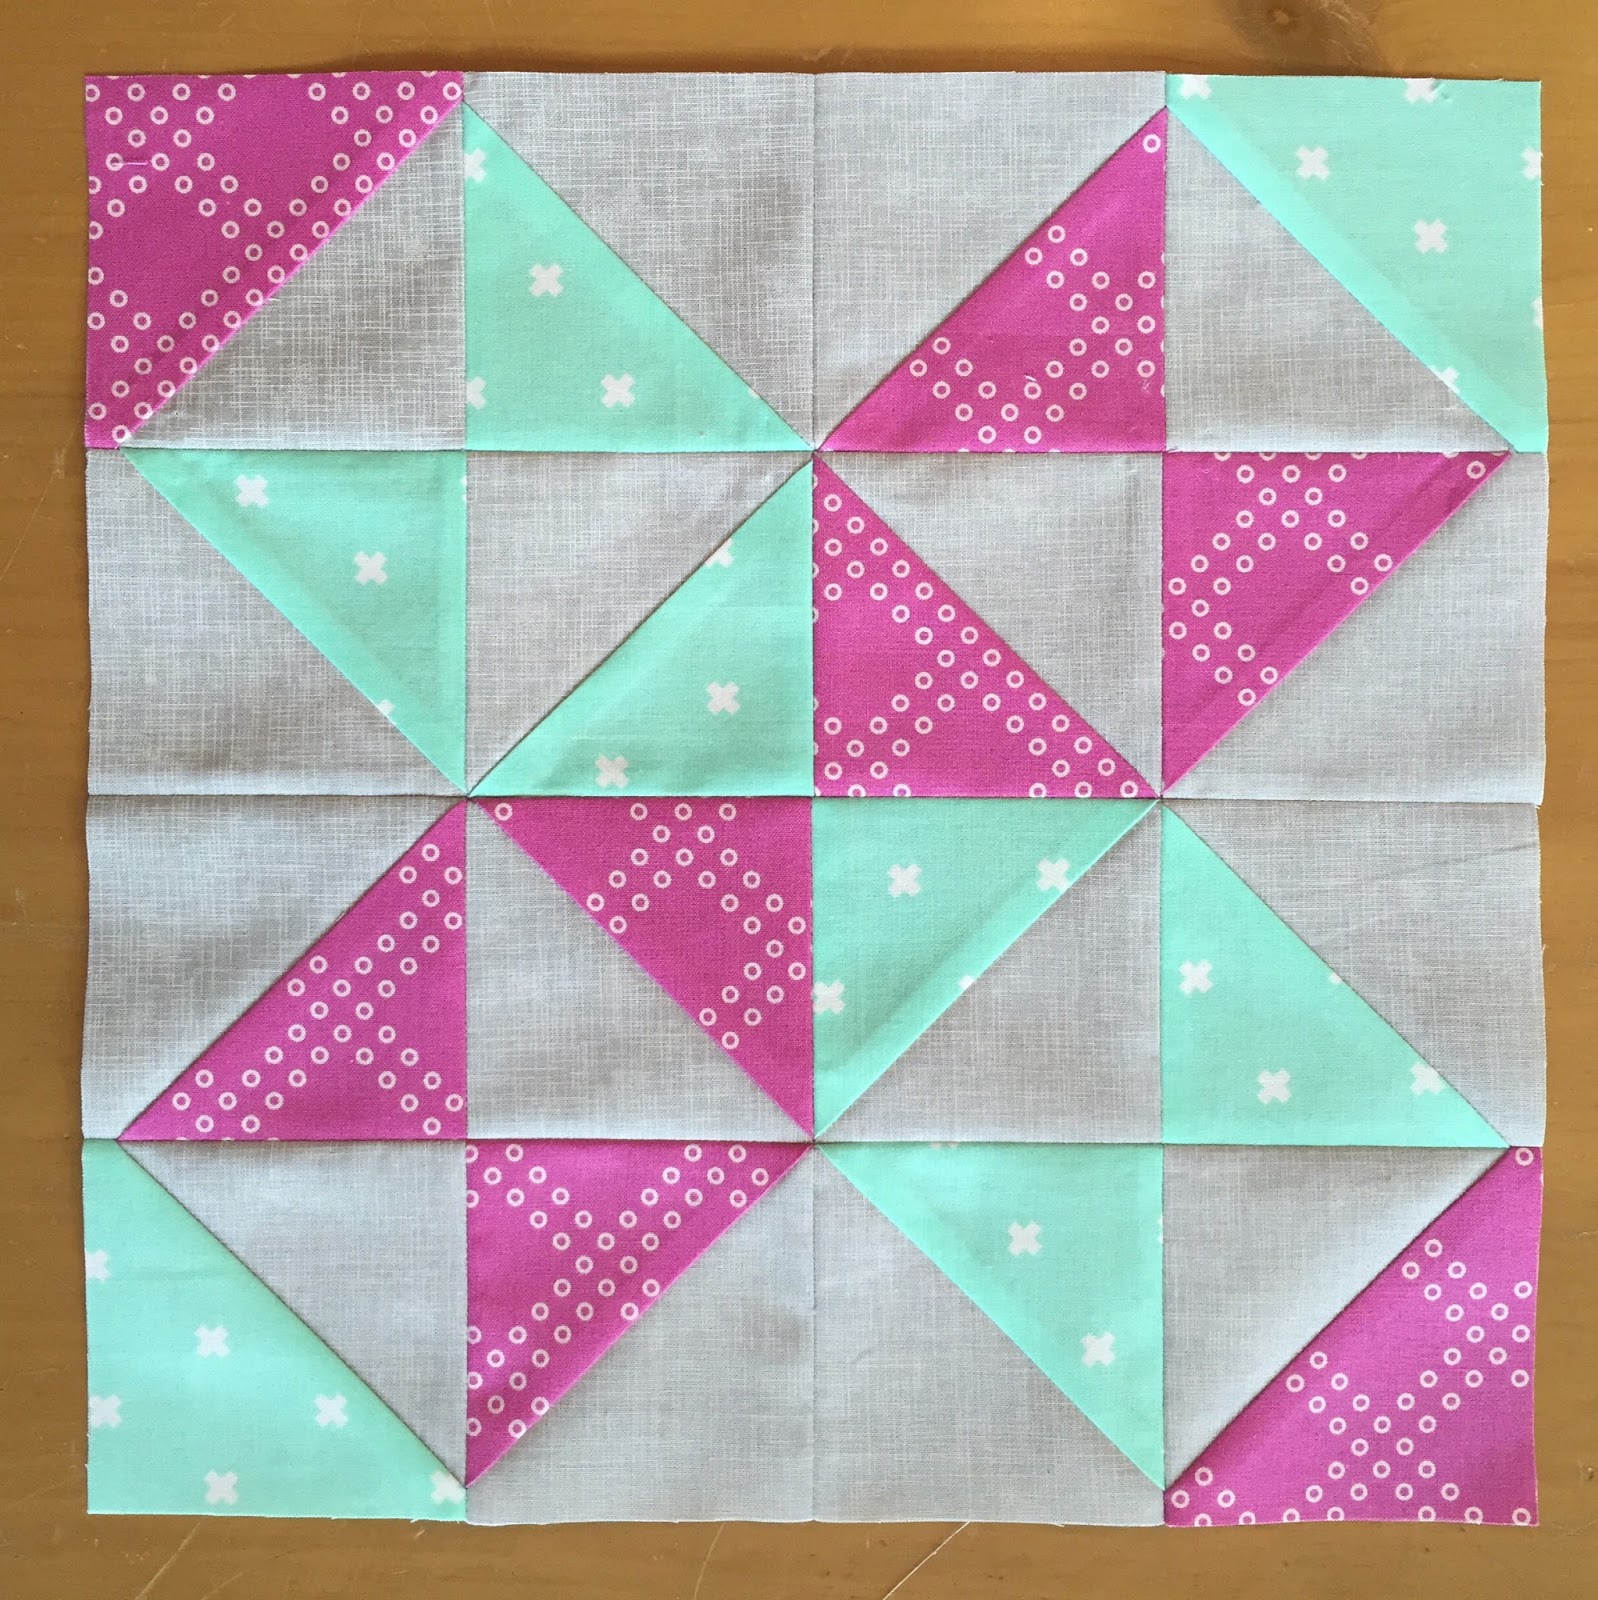
block 15 : windmill
As I finished my two most recent blocks (shown above), I could clearly recognize my improvement and evolution.  The blocks look crisper, more precise, the fabrics complement the design more so that my first few blocks.  I've also learned that slowing down and using the right tools makes all the difference.  Specifically, starching before cutting has helped, although I don't do it every time. I've always been a big fan of pressing, but I finally realized that using a dry iron vs steam is best and avoids the ripply look of my early blocks.  A tool that has really helped me is the Fons and Porter Quarter Inch Seam Marker.  Marking the seam line rather than the center line of the HST allows for more precision in my stitching.


hotel floor progress shot! i've been taking my machine along on work trips.
Looking back at  my earlier blocks, I don't love a few. I could easily remake them with different fabric choices or better process, but I'm not going to.  They are staying in the final quilt as a reminder of my progress!


block 1 : candy


block 5 : mountain

If you'd like to see all my blocks from the sampler, click the pages at the top of the blog. I've added a page for the Modern HST Sampler and post my blocks as they are completed. 

I've also started a second sampler, the Summer Sampler 2016, which has taught me many more lessons and deserves its own post!  

Lorna

Follow my blog with Bloglovin

Follow

Tuesday, June 21, 2016

Reflections on Glamp Stitchalot 2016

I had the opportunity to attend Glamp Stitchalot earlier this month, hosted by the amazing and hardworking team from Pink Castle Fabrics, in Ann Arbor, Michigan.  Unlike most attendees (who bought tickets a year or so in advance), I only decided to attend a month prior when a friend needed to sell her ticket.  It was sort of an impulse decision, but come on, the teachers were Rashida Coleman-Hale, Carolyn Friedlander, Penny Layman, Monica Solorio-Snow, Violet Craft and Elizabeth Hartman.  Not exactly a bad line up, especially for someone who is relatively new to quilting and is firmly planted in the mania/hyperfocus/obsessive phase.  Give me all things quilty.  Right now.  (I know some of you understand what I'm saying).  

Glamp Stitchalot 2016 Review
Airplane Block by Rashida Coleman-Hale.  

Ann Arbor was an easy four hour drive for me from Cincinnati.  A bonus revelation, because I thought for sure it was more like five hours until I hopped in the car to leave and set the navigation. Only four hours - Sweet!   


Overall, I have to say, the event was incredibly well organized.  The staff worked so hard to present an amazing event weekend - a packed agenda with six different classes by amazing teachers, great meals and other social time, giveaways, support from vendors, a pop-up shop, machine rentals, etc. Because the team thought of everything and made it happen so seamlessly, all attendees had to do was wake up, shower (hopefully) and sew! Just show up!  The weekend offered a chance to learn from the best, have plenty of fun and recharge. There were all levels of skill and experience in attendance, so the environment was very comfortable and inspiring.


Glamp Stitchalot


Glamp is a "Choose your Own Adventure" sort of thing - with each attendee (Glamper?) choosing their level of intensity, the amount of sewing they'd like to accomplish, and also the level to which they want to socialize.  Some quilters may choose to approach Glamp truly as a immersive learning weekend, soaking in as much knowledge as absolutely possible.  Some approach it as a fun getaway to socialize with others who "get us" and speak the same quilty language.  Others may approach the weekend as an opportunity to speed sew and close down the sewing rooms each night to bust out as many blocks as possible.  And some do a little of each approach.  The point is, it's your choice.  There is plenty opportunity to socialize from an opening mixer to class time to lunch and dinners to a dance party (and probably a few after-parties)!  You can go all #fangirl with the amazing teachers, who are celebs in the sewing sphere, by asking asking for autographs and selfies.  Or you can stay more low key (I did, and it was a good recharge).  It's all up to you.


Glamp Stitchalot 2016 Review
Elizabeth Hartman's blocks.


The pre-event communication was great, with packing lists, a preview of the pattern and a very active Facebook group where we could pose questions and get information, make introductions and share information.  Brenda gave guidelines on how much fabric to bring and offered bundles to make things very easy for attendees.  I took a bundle of Kona solids that I already had (it was a quilt kit from 2014 and I absolutely love the colors), some Essex linen for background and a few of the new Indah Batiks from Me + You (which made fabulous shutters on my house blocks!)  I didn't do any prep other than last minute packing (the morning I left). Work and life is busy, so I really didn't have time to put a lot of thought into my approach and didn't pre-cut my fabric, although some did since we had the patterns in advance. I chose my fabrics and cut on-the-fly as each class began. It worked out great for me and I avoided some stress, too.


Glamp Stitchalot 2016 Review
One of Carolyn Friedlander's blocks.


Some tools that were especially helpful for me were a small cutting mat and rotary cutter to use machine-side (tip: mark your tools with your name or washi tape), a seam roller (I was shocked how well these work for paper piecing), an add-a-quarter ruler (so fast for trimming seam allowances during paper piecing) and a thread catcher.  And don't forget essentials like pencil, pen, sharpie (if you want autographs), etc.


A  pouch swap was offered for this Glamp and I participated.  Darci made the cute and colorful box pouch and threadcatcher above, which I love along with the extra goodies.  I made an Open Wide bag, by Patterns by Annie, shown below mid-construction, for Lisa who loves black and purple.  It's a sturdy and roomy bag with very nice finishing details.

Open Wide Bag Patterns by Annie


Finding your swap partner at the opening dinner/mixer helped some Glampers to break the ice. Another conversation starter was wearing a handmade garment or carrying a handmade bag. (I have mental notes of some things I'd like to make as a result! Inspiring!).  Some attendees swapped pins to make connections.   One of the members of my group, Jodi, made each group member and instructor one of the selvedge needle books shown above.  Super thoughtful!


I was able to finish several blocks and try curves, paper piecing and flying geese - all for the first time!  I knew not to expect a finished quilt top to take home. I'm grateful for the new skills, tips and confidence I gained, along with some new friends. Yay for staying connected on instagram!

  
Glamp Stitchalot 2016 Review
Progress shot.

My advice if you attend a future Glamp or similar event:  Be open to new techniques and step out of your comfort zone.  The next Glamp in November 2016 is all about improv and SO tempting!

Follow my blog with Bloglovin

Follow

Thursday, June 16, 2016

New Sampler Pages

I added some pages that can be accessed in my header, to post progress on ongoing projects like sampler quilts. Currently, I am working on two samplers:  Modern HST Sampler and Summer Sampler 2016.  I link to both on their respective pages and show some progress pictures.  As a new(ish) quilter, participating in both samplers is helping expand my skills.

Summer Sampler 2016

Alyce's (from Blossom Heart Quilts) Modern HST Sampler, as the name implies, has introduced me to many different methods of making and arranging half-square triangles, such a staple for block building.  Also, working with a wide group of fabrics has challenged me on fabric selection for each block. My fabric pull includes over 10 designers, prints and solids, florals and geometric prints, and at least four different color families. It's been a great stretch for me to choose fabrics carefully for each block and maintain cohesion.

Modern HST Sampler

The Summer Sampler 2016 has allowed me to practice some additional techniques like curves and paper piecing.  For this sampler, I chose a very different set of fabrics - just 6 fabrics, mostly solids, in a limited and subtle color pallette.  This fabric pull is challenging me, too, in different ways. I'm loving the cool, calm vibe these fabrics are creating, still with a punch of color that I can't resist.

Summer Sampler 2016

Two samplers, along with my attendance at Glamp Stitchalot (post coming soon), are combining to make 2016 a year of skill building at just the right pace.  I'm loving it!

Friday, May 13, 2016

2015 Swaps


I dabbled in a few swaps in late 2014 and 2015.  It is an interesting process which allowed me to try some new things and actually finish some projects given the deadline and hopeful partner waiting on the other end of the swap.

My first swap was the #merrymodernswap.  After considering a scrappy Christmas tree mini-quilt, I landed on this tree table runner that pairs natural linen with some colorful prints.  A few years ago I made a similar pillow and my swap partner had a similar project on her inspiration collage.  I won't lie, I felt a little pressure when my partner was revealed as a super-talented pro in the swap game. She nails every swap - project, extra goodies and packaging.  I love how this turned out.  I considered binding but thought turning out would maintain the simplicity and modern feel of the project.  I'm glad I went that direction.  An edge of binding, even in the matching linen, would have distracted from the simplicity of the trees.  And I do love that sole red tree :)


Handmade Christmas table runner sewn in linen


For a local meetup, I participated in a zipper pouch swap.  Ellen mentioned loving the new (at that time) Doe collection from Carolyn Friedlander.  I purchased a charm pack and paired some of the prints with other fabrics from Carolyn that I had on hand - gray crosshatch for the exterior and a white/orange Botanics leaf  print for the lining. I kept things simple and let the fabrics shine.  To add some interest, I quilted random straight lines in coordinating thread colors. Those colorful lines are my favorite part of the pouch.


Carolyn Friedlander Doe fabric


My favorite and most colorful project of 2015 was a Raspberry Kiss Mini made for the #lovewinsminiswap which celebrated the Supreme Court's wonderful decision for marriage equality. How gorgeous is this bundle of Karen Lewis Textiles screenprints?  The colors are a highly saturated take on the rainbow and worked well with assorted low-volume gray and white prints for the background and sashing.  The rainbow kiss blocks from Wooden Spool Quilts  are so fun and easy to make.  I was challenged a little on layout once my blocks were made, and after at least 20 trial layouts, I decided on the 3 x 3 layout with sashing.  I really love this project not just for the beauty and meaning behind the quilt, but also the challenges it offered me in color and layout and my first hand binding.


Raspberry kiss rainbow mini quilt


Toward the end of 2015, I participated in a bag swap at the #OHcraft sewin.  I followed the drawstring bag tutorial by Jeni Baker which is very easy to follow.  I absolutely love these Cotton + Steel fabrics paired with Essex linen.  At the last minute, I made the accompanying mini bag in a Denyse Schmidt fabric that matched perfectly!

Drawstring Bag by Jeni Baker


Thursday, October 23, 2014

First Quilt - Strip Tango for my Niece

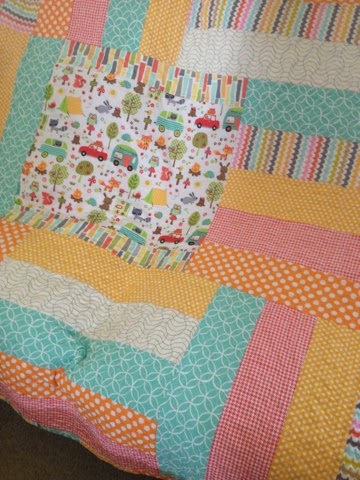
I made my first quilt!  It was a gift for my youngest sister who is expecting a baby girl.  I don't know if I would advise making your first quilt as a gift!!  You might want to practice a little, first. Nevertheless... I had fun with this process and learned so much.  Choosing the fabrics and piecing the top was so fun and actually went fairly fast, in comparison to the rest of the process - sandwiching, machine quilting, binding. 
strip tango quilt
 Initially, I planned to use Heather Ross' Briar Rose collection for her quilt, but once I saw the crib bedding, I changed my mind.  I decided to mirror my niece's crib bedding which features little foxes and orange and aqua tones.  First I found the cute, cute, cute woodland animal fabric used in the center panel  It is "Camp Out" in white from Michael Miller's Sorbet Collection. From there I chose the other fabrics, also Michael Miller except for the white print (which is Washi). I love the fresh colors and combination of patterns. I purchased the fabrics from fabric.com and really liked using the design wall feature to see the fabrics together.  The backing, which is not pictured, is "Widescreen"crosshatch from Carolyn Friedlander in gray on white.  

Strip Tango quilt

The quilt pattern, which I found via Pinterest by searching baby quilt is Strip Tango from My Quilt Infatuation.  It uses large strips (4.58 x 20.5 inches) which are quick to piece and allow for a little play with the different fabrics. The woodland fabric became a feature block framed by one of the other prints. I definitely recommend this pattern for a first quilt, or when you need to make a quick quilt to gift. 

string tango quilt

So, true confession, I started this first quilt with a definite deadline (baby shower!) without really knowing what I was doing.  Piecing the top was so fun and went very fast....and then the project stalled. I had read about the sandwiching and qulting process, but had never actually done it.  I started reading blog posts and pulling all the dusty quilting books in my sewing room, to prepare myself to jump in!  I decided to take some steps to simplify the process.  I didn't try pin basting and went for spray basting, which was fairly easy after I watched some youtube videos for tips.  I also did not piece the back, so that also simplified things.


Next, I needed to machine quilt this beautiful basted sandwich.  I should mention that this baby quilt is really not "baby" sized, at 48"x60" and I really didn't take into account wrestling this through my small-throathed machine. But, I learned from the experience.  Again, I watched some youtube videos that were incredibly helpful and will add the links when i find them. I quillted in randomly spaced vertical lines with a very loose multi-step zip zag stich.  I got inspiration for the quilting style from a post on Vanilla Joy.  You can sort of see my quilting lines in the blurry picture above. (another lesson learned, take plenty of pictures before you race off to gift the quilt!).  For the center block, I stitched around the outside borders. It was sort of a pain to quilt around this block and I wasn't quite sure what to do when I ended a row of stitching at the center block (ie bury the threads, lock stitch, etc??), so things got a little messy. Hopefully my niece won't mind ;-).

strip tango quilt

For the binding, I kept the process simple and machine stitched.  I think it looks nice. Perhaps, I'll hand stitch the binding.  I have one last step on this quilt and that is adding a label. After sweet baby girl is born, I want to make a label with her name and vital stats!